Wednesday, May 31, 2006
Book of Dreams: Week 6 {Pop-Ups}
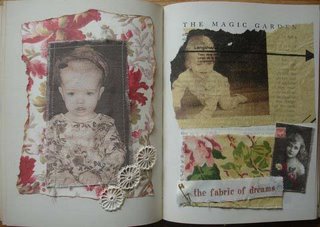
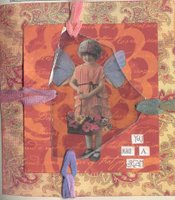
This week we are going to try fun and easy POP-UPS for your altered Book of Dreams. I was very excited to use some wonderful vintage postcards I received from Cassondra and this neat card from Sarah Fishburn on this spread.
The first technique uses an image or a picture mounted on cardstock for firmness. A card or postcard is thick enough on its own. You start by folding the image lengthwise to form a crease. Open your book to the page that you want the pop-up layout in. Place the image over the pages, aligning the crease of your fold with the spine of the book. On the book pages, use a pencil to mark the locations of the four corners of the image. Set the image aside. Begin folding the pages by folding the edge of the left side page inward towards the spine, creasing it along the margin of the text of the page. Do the same thing with the page on the right side. Fold both pages in the same direction again so that the edges match the pencil marks on each page. Tape down the folds, so you now have a pocket on each page.To make the image pop out, make flaps on the side by adding a 1 inch wide and 3.5 inches long piece of cardstock taped onto the edge two sides of the image. Put adhesive on the front side of the flaps. Place the flaps into the pockets closest to the spine and adhere them. Decorate the pages however you'd like and there you go! The postcard will pop forward when you open and close the book.
The second technique is making a pop-out mini book on your altered book page. Cut a 8.5" by 8.5" square of cardstock. Lay it on the table in front of you and fold it in half side to side, crease well and unfold. Next fold in half top to bottom, crease well and unfold. Turn the paper over and fold it in half diagonally. Crease well and unfold. Turn the paper over again and lay it out so that when you press in the middle the corners will pop up a bit. Bring the top corner down to meet the bottom corner. Push the two side corners in so they meet in the center. When this is done righ, you'll have a nice little square. Press the whole thing down flat. Adhere to page and put something a little bit heavier on the "cover" to keep the book down. Here I used some metal embellishments I made for last weeks technique. You can do whatever you want to the inside. Here I printed out a quote before I started folding. You could even make multiple books and attach them together to make a "caterpillar" type accorian book. Have fun!
I hope I provided enough instruction with these so that they make sense. Let me know if you have any questions. As always, I can't wait to see your work:)
Monday, May 29, 2006
End of a long weekend...
Well I had a productive weekend, hope you did too. Here are a bunch of projects I got done. Some custom layouts for a loyal customer of mine that just lost everything in a house fire. She lost all her pictures, scrapbooks, everything! Can you even imagine?! I tried embossing for the first time on the fire layout. Also, a few gift mini books and some fun frames. I even snuck in some time to work on this weeks technique for the Book of Dreams challenge. Are you all still with me on that? This week will be a fun one:)
I'm really, really excited to start some collaborative projects with some of my favorite artists. Cassondra and I are going to do a collaboration on a theme inspired by the book She by Kobi Yamada. Ashley C. and I are going to do a Funky Buddha collaborative. Can't wait to get started with both of these amazing women!
Wednesday, May 24, 2006
Book of Dreams: Week 5 {metal}
In the meantime, this week we're talking about METAL. I've been looking forward to this one! I feel a bit unprepared in the sense that I have several techniques to show you, but don't have my finished pages done. I will be posting those as I finish them. Hopefully in the next few days:)
Faux Metal~
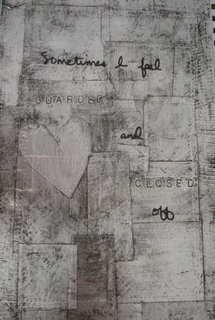
I haven't worked a whole lot with metal, but I love the look so I tried out a few new techniques myself this week. The first one is one that I learned from Karen Michel. I have seen her use this technique on several different projects. It's actually a faux metal. It's very easy to work with and gives unique results. You start with a roll of aluminum foil tape. This has a PVC film backing and is used for heating ventilation and air conditioning applications. I found it at Home Depot. For this page (above) that I did during the 21 day challenge a few months back, I simply cut the tape into different size rectangles. I then went around each rectangle close to the edge with a tracing wheel which could be found at any fabric store. This made tiny little uniform dots around the edges that almost give it a quilted look. I then peeled the backing off the tape and layered the pieces haphazardly to cover my page. Then you simply add a few drops of India Ink spread it around with a paper towel and let it sit for a short while (about a minute). While it's still wet wipe off ink with a clean paper towel. You will see that the ink fills in the holes and any design that you put on your tape. You can rub it all off and the tape will be shiny or leave a bit of black for more of a distressed metal look. Very easy and fun!
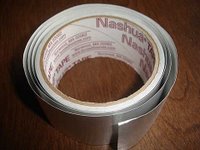
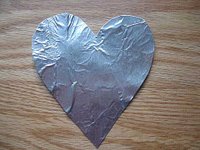
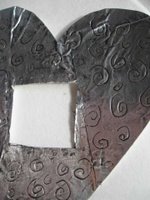
Using the same technique as above, I layered a few pieces of tape together on a piece of wax paper. I then cut out a heart and cut a small square in the center. Using the eye end of a needle, I carefully carved swirls onto the tape. You could use any object that isn't too sharp to poke through the tape and make any designs you would like. Let your imagniation run wild!
Metal words~
To make metal words, you will need a letter punch set. This can also be found at the hardware store. You can then gently tap the letter onto a sheet of metal (I like to use copper) and make your word. You can again add India ink to it or you could use aging paints for a weathered look. If you don't have a punch set you can use the foil tape we used in the above technique and just carve letters into it by hand, it is very soft and easy to work with.
Aging metal~
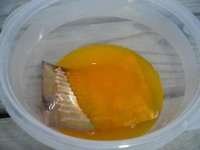
This technique I have been wanting to try for a long time. I haven't because it involves using a chemical. However, I really wanted to see how liver of sulphur ages metal, so I got out my goggles and my gloves, went outside and gave it a whirl. You DO NOT want to get this on your skin, it can cause a chemical burn. Place one tablespoon of potassium polysulfide (liver of sulphur) in a plastic container. Add one cup of water and stir. Set aside. Spread a very thin layer of petroluem jelly onto wax paper. Pick a favorite stamp and stamp into the petroluem jelly on the wax paper and then stamp onto a small piece of copper. Clean the stamps with a wet sponge. With tweezers, place the stamped copper into the plastic container of liver of sulphur for several seconds. The sulphur should start to "antique" the copper and the stamped image will remain clean. The petroluem jelly will act as a resist. Remove the copper with tweezers and place it onto paper towels. Let it dry thoroughly. Buff the copper on both sides with a paper towel. Some of the sulphur will flake off.
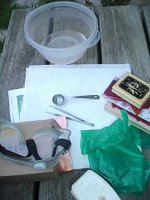
The "authentic" (and less caustic) way to age metal is to create an actual rust. Claudine Hellmuth explains this technique in her book Collage Discovery Workshop. The fumes can be toxic, so make sure you do this outside. You can do this by mixing a solution of half bleach, half vingear. Make enough to completely cover the objects you want to rust. Drop your metal into the solution. Some metal objects may require a light sanding with steel wool to get the protective coating off so they will rust properly. Tin pieces should rust in a matter of minutes. If you are using other metals, other than tin, you may need to leave them in the solution anywere from two days to a week. Once your objects are rusted, set them out to dry on paper towels.
Since I haven't provided a lot of finished art work this week, here are some fun links to go to for lots of inspiration. The lovely Belinda Schneider shows some art using mesh and talks about liver of sulphur. Her art is even on dreams, how perfect! LK Ludwig uses quite a bit of metal in her work in ingenious ways. Also, in the Winter 2005 issue of Cloth, Paper, Scissors magazine there is an extensive article on transferring images to metal.
This week I challenge you to use metal somewhere in your work. Some other ideas that I haven't show here are using mesh, which can be folded so the edges are smooth. You can attach with eyelets or brads. It looks neat to fold mesh into a pocket on your page. Don't forget about staples! Many found objects are metal. Think about what you might find on the street that you could use, soda twist tops, safety pins, hinges, washers, keys, you name it! Have fun, can't wait to see your work:)
Monday, May 22, 2006
Try It Tuesday: week 1
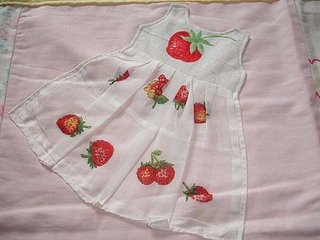
Wewh, made it with just minutes to spare before the deadline...literally! I made this for my niece who turns two in a couple of weeks. I used the technique for this week from Try It Tuesdays. What a fun challenge Chrysti has started:) Check it all out here.
Saturday, May 20, 2006
New space
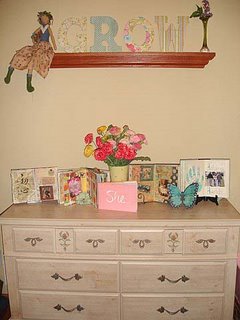
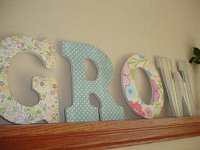
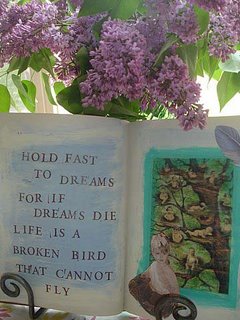
I found this dresser today to store all of my art goodies:) I am so pleased. I have been looking for a while for something that looks nice, since my "studio" is our dining room, and is functional. This works perfectly. I will have a rotating display of my work on top of it. Here are several of my altered books. I finally finished the GROW letters that you see above on the ledge. I find the space very inspiring and practical at the same time. My husband looked at it and said, "that is so you." I love that! The quote above is from the book "She.." by Kobi Yamada. It was recommended to me by Heidi Swapp. It is what her whole "She" empire is based on. Wonderful stuff.
Thursday, May 18, 2006
Massive collage image site!
Check out this Flickr group that has over 1600 copyright free vintage images to use in your art work. You just have to join the Flickr group and you have access to them all. Wooohooo!!! If you're not familiar with Flickr, go to the bottom of the page and create a free account. Thanks Chrysti.
Cassondra has some fantastic pictures on her flickr site too!
Wednesday, May 17, 2006
Book of Dreams: Week 4 {windows, doors and niches}
The first technique is one that can be done with the cover of your book, if you haven't worked on that yet. I knew I wanted to use these doll shoes and a picture of my daughter and myself around the same age. First, you mark the edges of the hole you want to cut. Place a cutting mat inside the cover to protect the pages of the book. Then cut through the cover using a craft knife and the ruler as a guide to cut straight lines. This process takes a bit. My cover was pretty thick, so I cut through bit by bit until I could push the piece through and was left with the hole. You can then paint the front, the inner edges, the inside, whatever you'd like. Place an image (or in this case some doll shoes) inside the hole and you're set! Here are a couple more wonderful ideas on cover niches and doors.
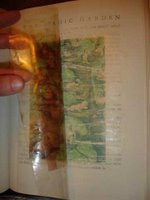
Next, I tried a window with the pixie picture I did last week. I used mica as the window "glass". There are many different ways to do windows. Some simple techniques would be to cut a circle, or triangle, or even rip a hole in the page. Then put an image on the page behind it, as if it is looking through the window. What I did here is, I drew an "X" on the page with my craft knife. Again, be sure and have a cutting mat behind the page, so that you don't cut through more than you want! I then folded back each triangle from the "X: and folded each again. Placing an image on the following page, you get the window effect.
A similar technique is used in creating a door. Doors are interactive, drawing the observer into the page. You can either use a stamp or here I used two doors from a magazine. I put them on with tiny little hinges and cut out the page behind the door. I then placed an image on the following page, like what we did with a window. When you open the door, you can see what is revealed.
The last technique, I've always wanted to try. Paula shared a link to Karen's web site and her *amazing* reliquaries and I knew I just had to give this a shot. Also check out her altered books and prepare to be inspired! I had this giant charm from a necklace I've had for years. I knew it would be perfect for this niche:)
A niche or shadowbox is used to hold large embellishments or objects that would not otherwise fit into an altered book. It is created by making a deep cut into a block of pages. To start, it is best to use the front or back cover of the book as the bottom of your box to provide best support. I used the back of the book. Gather a group of pages that begins or ends with a page next to a cover. The thickness of the group determines the depth of your box. Use a flat brush to apply gel medium to the side, top and bottom edges of this group of pages. Hold the pages together with bulldog clips while it dries. Once it is dry, you use the same technique we did on the cover. Mark the box that you'd like to cut, put a cutting mat between the group of pages and the cover. Using a cutting knife and a ruler, gradually slice through the layers of pages. Then apply glue to the back of the block of pages and adhere to the cover or back of the book. Paint and embellish however you'd like!
Here are a couple another tutorials on creating a niche.
Hope you all have a great week. Please share links to any pages that you post on your blog in the comments. Thanks!
Sunday, May 14, 2006
Wednesday, May 10, 2006
Book of Dreams: Week 3 {Images}
Transparencies
Let's start with transparencies. There are several techniques that you can do. You can print right onto transparencies with a regular ink jet printer. Just make sure you buy the kind that say "Ink Jet Printer Transparency Film." You can manipulate your photo all you want first. Then print out onto the transparency following the directions in the box. If you have words on your picture, make sure to print mirror image.
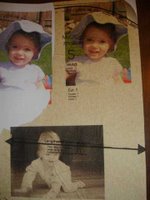
Using a brush, put a layer of gel medium onto the paper that you want to transfer your photo to. Then put your transparency with shiny side UP and the side that the ink was printed on, down onto your paper. Rub firmly with a credit card. Wait a couple of minutes (you can check on it by peeling it up a bit) and then carefully remove the transparency. Your photo will remain on the paper! I did that technique here, then decided I wanted more color, so I placed the transparency back onto the photo and it stuck, because it still had gel medium on it. I like how you can see the brush strokes through, so it now has a layered effect.
If you have a Xyron machine, you can put the transparency right through and then you can adhere the picture to anything you'd like. Here I attached it to a library card. Paper with writing on it looks neat, since you can see the writing through the picture. If you don't have a Xyron, you can use glue dots to adhere it to the paper.
Tissue paper
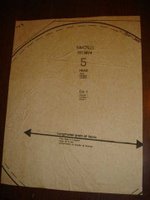
You can can print a picture onto tissue paper, by first adding a "carrier" onto the tissue so that it is thick enough to send through your printer. Spray a light coat of spray adhesive onto an 8.5x11" sheet of white copy paper. Carefully place a piece of tissue paper (here I used a dress pattern) onto the paper. Be very careful, the paper will be very sticky! Flatten out all the air pockets and wrinkles. Let it dry a few minutes. Put through your printer to print whatever photos you would like onto it. Let the ink dry for a minute or two. Then carefully peel off the tissue paper. This pattern paper was so thin that it ripped quite a bit, so I worked that into the design. Regular tissue paper should be a bit less fragile.
Fabric
Printing onto fabric is very similar to printing on tissue paper. To make a "carrier" for fabric to print onto, you use freezer paper. You cut a piece of freezer paper 8.5x11" and iron the shiny side of the freezer paper onto a piece of muslin fabric. This is a white or off white colored, thin, cotton fabric. You can then put the piece of fabric attached to the freezer paper into your printer and print your pictures onto it. Make sure it is fabric side up, so you are printing directly onto the fabric. You can also print words onto the paper. Whatever you'd like! You can then sew or glue your fabric picture to your page. *If you're afraid of jamming up your printer (this has not happened to me), you can always buy the t-shirt iron on transfer paper, print an image onto it and iron it onto muslin.
Vintage pictures~ "Instant ancestors"
These can be found at flea markets, estate sales or maybe in your own attic! They are very fun to use. Some people call them "rescused relatives" because people feel they've rescused these people from oblivion. They like to make up stories for these people with their art. I still need to add this little pixie to my altered book.
Manipulated pictures
One easy way to manipulate a picture is with fine grade sand paper. It will make scratch marks on the photo and will take off some of the color. If you want to add a color wash to the picture, you can then just paint over with watercolor paints. Karen Michel's book Altered Imagery has many fun ideas for manipulating photographs. Here I used my new letter stamps. Woops, the "s" are upside down. oh well:)
As I mentioned, there are many, many techniques you can use with your photos. Here is one good resource with many techniques to try. Here are a couple of more. One using packing tape and the other with gel medium. I know you all use photos in your art and your BOD already. I hope that this will provide some inspiration for you to try something new. Can't wait to see what you come up with!
I keep redefining my Book of Dreams. It seems to have evolved into the theme of Dreams of a Little Girl. I think I will continue to add quotes to many of my pages, probably long after this project is done:)
Sunday, May 07, 2006
Sunday estate sale treasures
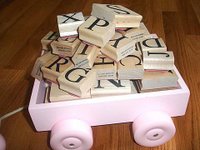
I also found this set of wonderful alphabet stamps. Two different sizes, complete sets. I've been looking for a large set for ages. The little wagon was too cute to pass up.
I love this pull toy duck I found. It quacks and I collect pull toys. I think this is a vintage repro. The kids love it too! I also bought a printing block, that Lilli is going to have to give me some tips on carving my own stamps out of. Finally, I bought a pair of vintage patent leather doll shoes, perfect for the cover of my Book of Dreams book. I was inspired by this.